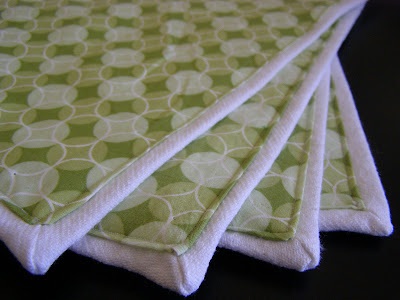
Bordered Breakfast Placemats Tutorial
Now I've called them breakfast mats just because they came out a little smaller than anticipated and would be better suited for a breakfast table for their size. However I'm excited to use them, especially since they didn't really cost me anything extra to make. All re used fabric.
The green print is from an old dress shirt of Pete's I bought him when we were dating but instead of getting rid of the shirt I decided to re use it and make something. The pattern on the fabric itself is nice, but not for a shirt.
Then I knew I wanted a white background for the mats but since I have made a little bit of a deal with myself that I wouldn't buy any new fabric, except of course for material to make things to sell etc... such as baby blankets, and bibs. I have a lot of fabric right now waiting to be used. Well I did not have any white fabric. It's not usually a color I would buy for sewing just because it feels limited and I'm not the kind of person to walk by a piece of white fabric, and say "Oh will you look at that, I must have it". Prints and colors though definitely get me.
Anyway, I had the green pieces cut and waiting for a while now, and while un-packing some boxes I found some tea towels I bought a long time ago at a dollar store. They are white with some cheap looking details along the bottom ends. Really nothing special.
Well I cut them and they worked well. So let's get started.
What you'll need:
- Fabric - depending on how many you want to make will depend on how much but I'd say average a yard for 4 not doubled and 1 1/2 - 2 yards for a basic doubled mat or bordered mat (like what I made & will be giving the tutorial on)
- Matching thread
- Sewing Tools - scissors, measuring tape, marker, needle, etc...
First you want to take your fabric and measure out your mats. You could use a marking pencil/crayon to make it easier. Mark and cut out your rectangles. Make sure to add about a cm on all sides as you will be folding this over. Also remember if it looks a little small it's okay as you'll be adding a border to your mat.
Once the fabric is cut fold over the edges and pin in place. Make sure your corners are nice and square. You can also iron the edges down instead of using pins if you wish. Baste the edges as seen below to keep in place and make it easier to work with.
Cut out your backing fabric giving yourself an extra 1 1/2 -2 inches more than the rectangle for the center. The extra is for the border.
Place your basted rectangular center's on your cut backing fabric centered in the middle of the fabric. Cut a slit in the corner's, equal distance apart from the all corners (this will make sure the mat is centered and balanced) but make sure you don't cut all the way to the corner. You want to leave the desired width of the border length from the end of the slit to the corner of the center mat. Confusing? Look below at the picture.
Fold over and stitch the corner slits on an angle mirroring the tip.
Then cut the excess fabric on the tip, and snip the corner on an angle.
Turn the corner's right side in. Fold over the edges of the bottom fabric to create a square and pin in place. Don't worry about how much excess fabric is on each side as it will be hidden once you stitch on the top piece.
You should now have a rectangular piece of fabric with all the edges pinned and the corners stitched.
Lay your basted top piece of fabric on top centered, and pin in place using the pins from the bottom piece. make sure your border around is even and straight at this point.
Stitch closely along the edge.
It should look something like this.
Cut your basting. I cut ever second one. Pull the basting thread out.
Great Job! You're done. Now place on your table, and enjoy!
Thanks for joining me.


Comments
Post a Comment